Thursday, 25 November 2021

Waterline | Marking Up - Twice!

The build manual states that the waterline on the prototype was set at 16 1/2" above the bottom of the keel, so that's where I marked it in. Like this, using a rule and a tape measure.


Then I used a laser level to mark the waterline across the transom, as here.


This is the laser level itself.
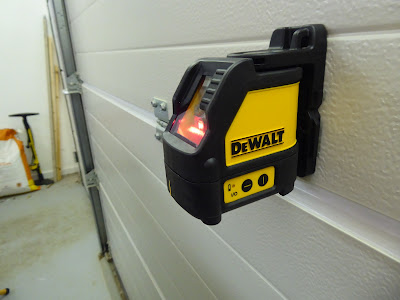

I initially bought the cheapest I could find, reasoning that I didn't need a quality instrument for such a small job.

Big mistake. The cheap level was rubbish and was promptly returned to the store, and this one was purchased instead. It worked perfectly and I am very happy with it.

I pencilled in the waterline across the transom and used the laser level to continue the line around both sides of the hull. This is the laser line on the port side.
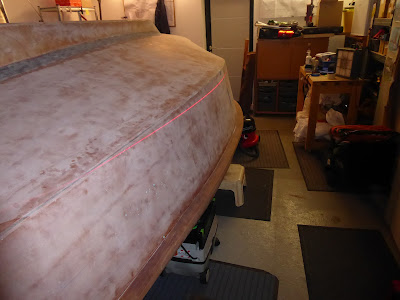

I pencilled in marks at short intervals and joined them with a straight edge to get a nice, fair, flowing waterline.

Here the line is crossing over the chine on the forward end of the hull.


So far, so good!

Happy with progress I taped in the waterline using some 3M Fine Line tape. It's really good tape, and conforms easily to curves.

Here is the view from the starboard bow.


But I soon realised that something was not quite right.

The waterline was symmetrical until it passed over the chine and back to the transom on the bottom of the hull. At this point it joined the transom at slightly different places port and starboard.

After some head scratching I worked out that this could only be because the hull itself is not perfectly symmetrical. The difference was very small - a few millimetres - but of course over the length of the boat this is amplified to a visible extent.

Given the method of construction this is clearly going to be an unavoidable issue. I needed to find a way to do this correctly.

I needed a datum point on the hull where I could be sure that the waterline was in exactly the right place.

As is often the case with PocketShip there is no such measurement in the drawings, so I examined photos of the prototype and noticed that the waterline crosses the chine at the front of the boat exactly below the forward edge of the forward porthole.

I used the laser level to check this on my boat and immediately saw a problem.

This is what the starboard side looked like.

 
It's way off where it should be, and wasn't even the same on the port side!

So off came the tape and the incorrect pencil line was sanded off.

Then I marked where the line should cross the chine on both sides and used the laser level to mark it from that datum point.

That went well and I now knew that the line on each side was exactly where it should be. The tiny visual discrepancy at the transom was removed by adjusting the waterline by a fraction on each side.

That looked great and I was happy, so a second waterline was taped up. Here is a view from the starboard bow.


That was very satisfying in a perverse and masochistic way! 

Levelling The Hull - Again!

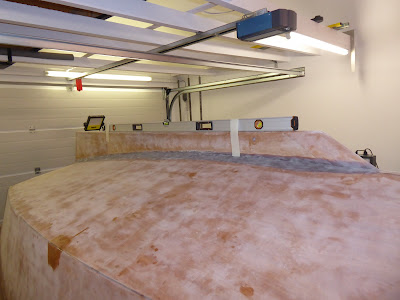
I wanted to be certain that the boat was exactly level when I marked in the waterline, so I double checked using a long level taped to the keel, as here.


I had previously only used a short level to do this, and sure enough the much longer level showed that the hull was not level fore and aft.

A similar exercise on the transom showed that it too was not exactly level, like this.


So the bottle jack was employed to level things up at the stern, as here.


And at the bow.


All was now ready for the waterline to be added.

Bowsprit & Mast | Pivot Holes

I would soon be varnishing the spars so pivot holes in the mast and bowsprit needed to be drilled.

First I set the bowsprit in place to mark up the hole, as here.


Then I set the bowsprit up on the pillar drill and clamped it in place, like this.


A spirit level ensured that the bowsprit was level and that the hole would be exactly perpendicular. Like this.


Here is the drilled hole.


I found that the drill did not have sufficient depth of travel to drill all the way through, so it had to be drilled from both sides. All went well.

The mast was next.

Here the mast is set up in the same way as the bowsprit, checked with a spirit level.


Lastly here is the drilled mast hole, again drilled accurately from both sides.


That was fun!


Keel | Pivot Hole

While drilling the centreboard I also drilled the pivot hole in the keel.

When I assembled the keel way back at the beginning of the build I thought it would be a miracle if the the pre-drilled port and starboard holes lined up exactly.

I was right. First I drilled the starboard hole, as here.


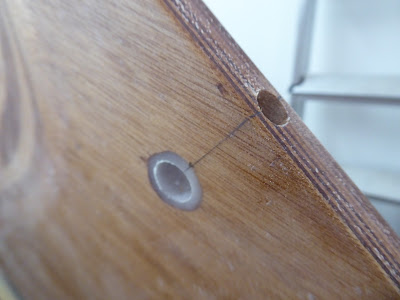
That looks OK, but when I drilled through and out the other side this is what it looked like from port.


Hmmm. That needs to be filled and re-drilled.

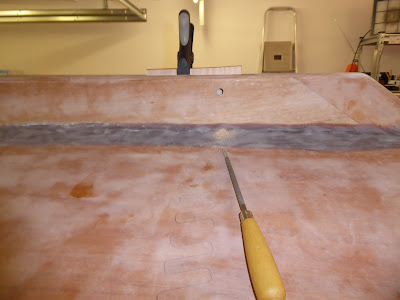
First I enlarged the misaligned hole with a rasp, like this.


Then I filled the hole with thickened epoxy and clamped a couple of plastic cards in place to retain the mixture. Like this.


This is what it looked like when cured.


Lastly I sanded off the excess epoxy and drilled a new hole, as here.


 All's well that ends well!

Centreboard | Pivot & Pendant Holes

It was time to get the centreboard ready for installation.

So the pivot and pendant holes had to be drilled.

I used the drill guide to make the holes through the board, to ensure that they were perpendicular. Like this.


I then carefully drilled a 9mm hole in the edge of the board, like this.


I filled this hole with thickened epoxy. A bolt wrapped in tape and passed through the board kept the epoxy in place, as here.


Lastly I drilled a 6mm hole through the epoxy plug for the pendant itself. It looked like this.


So now we have strengthened waterproof holes in the centreboard.

And it's ready for paint!

Hull Exterior | Clear Coating & Sanding

 A lot of sanding was required to get the hull to a suitable condition for paint.

The manual states that we could easily spend a day sanding the hull. I 'easily' spent several days on the requisite three clear coats of resin.

This is the part sanded hull after its second clear coat.


I am using the Rotex 90 sander with a medium-soft head in finish-sand mode. It works really well on curved surfaces.

This the hull after its third and final clear coat.


This is what it looked like after final sanding to P80 grit.


The bits of blue tape mark where a small ding needs to be patched or faired. There were very few.

And while I was at it I sanded the rub rails and rounded them over with a rasp and some sandpaper. As here.


They are looking nice!


Hull Exterior | Bubbles & Patches

When I sanded the fibre glassed hull I discovered that there were a number of tiny air bubbles on the side panels only.

They looked like this, with a rule for comparison.


I wasn't sure if this was a problem or not, so asked the vendor for advice.

They said that the bubbles were tiny and I should sand them out and coat them with epoxy.

I decided to grind them out and use fairing compound to get a flat surface before applying more epoxy. I used a small burr in the drill, like this.


This is what the ground out bubbles looked like when filled.


 Here they are after sanding and a second coat of epoxy.


I also managed to sand through the fibreglass on the hull in one or two places, so I applied patches to them, like this one on a puzzle joint.


I made the patches oversized to allow plenty of room for feathered edges and to provide strength.

We're getting there, slowly but surely!