Saturday 28 May 2022

Companionway & Tabernacle | More Primer

While varnishing various components I found once again that I had time on my hands. This is because each coat of varnish takes just minutes to apply, but has to be left overnight to dry.

So I decided to restart work on the companionway and tabernacle, which would save time in the future.

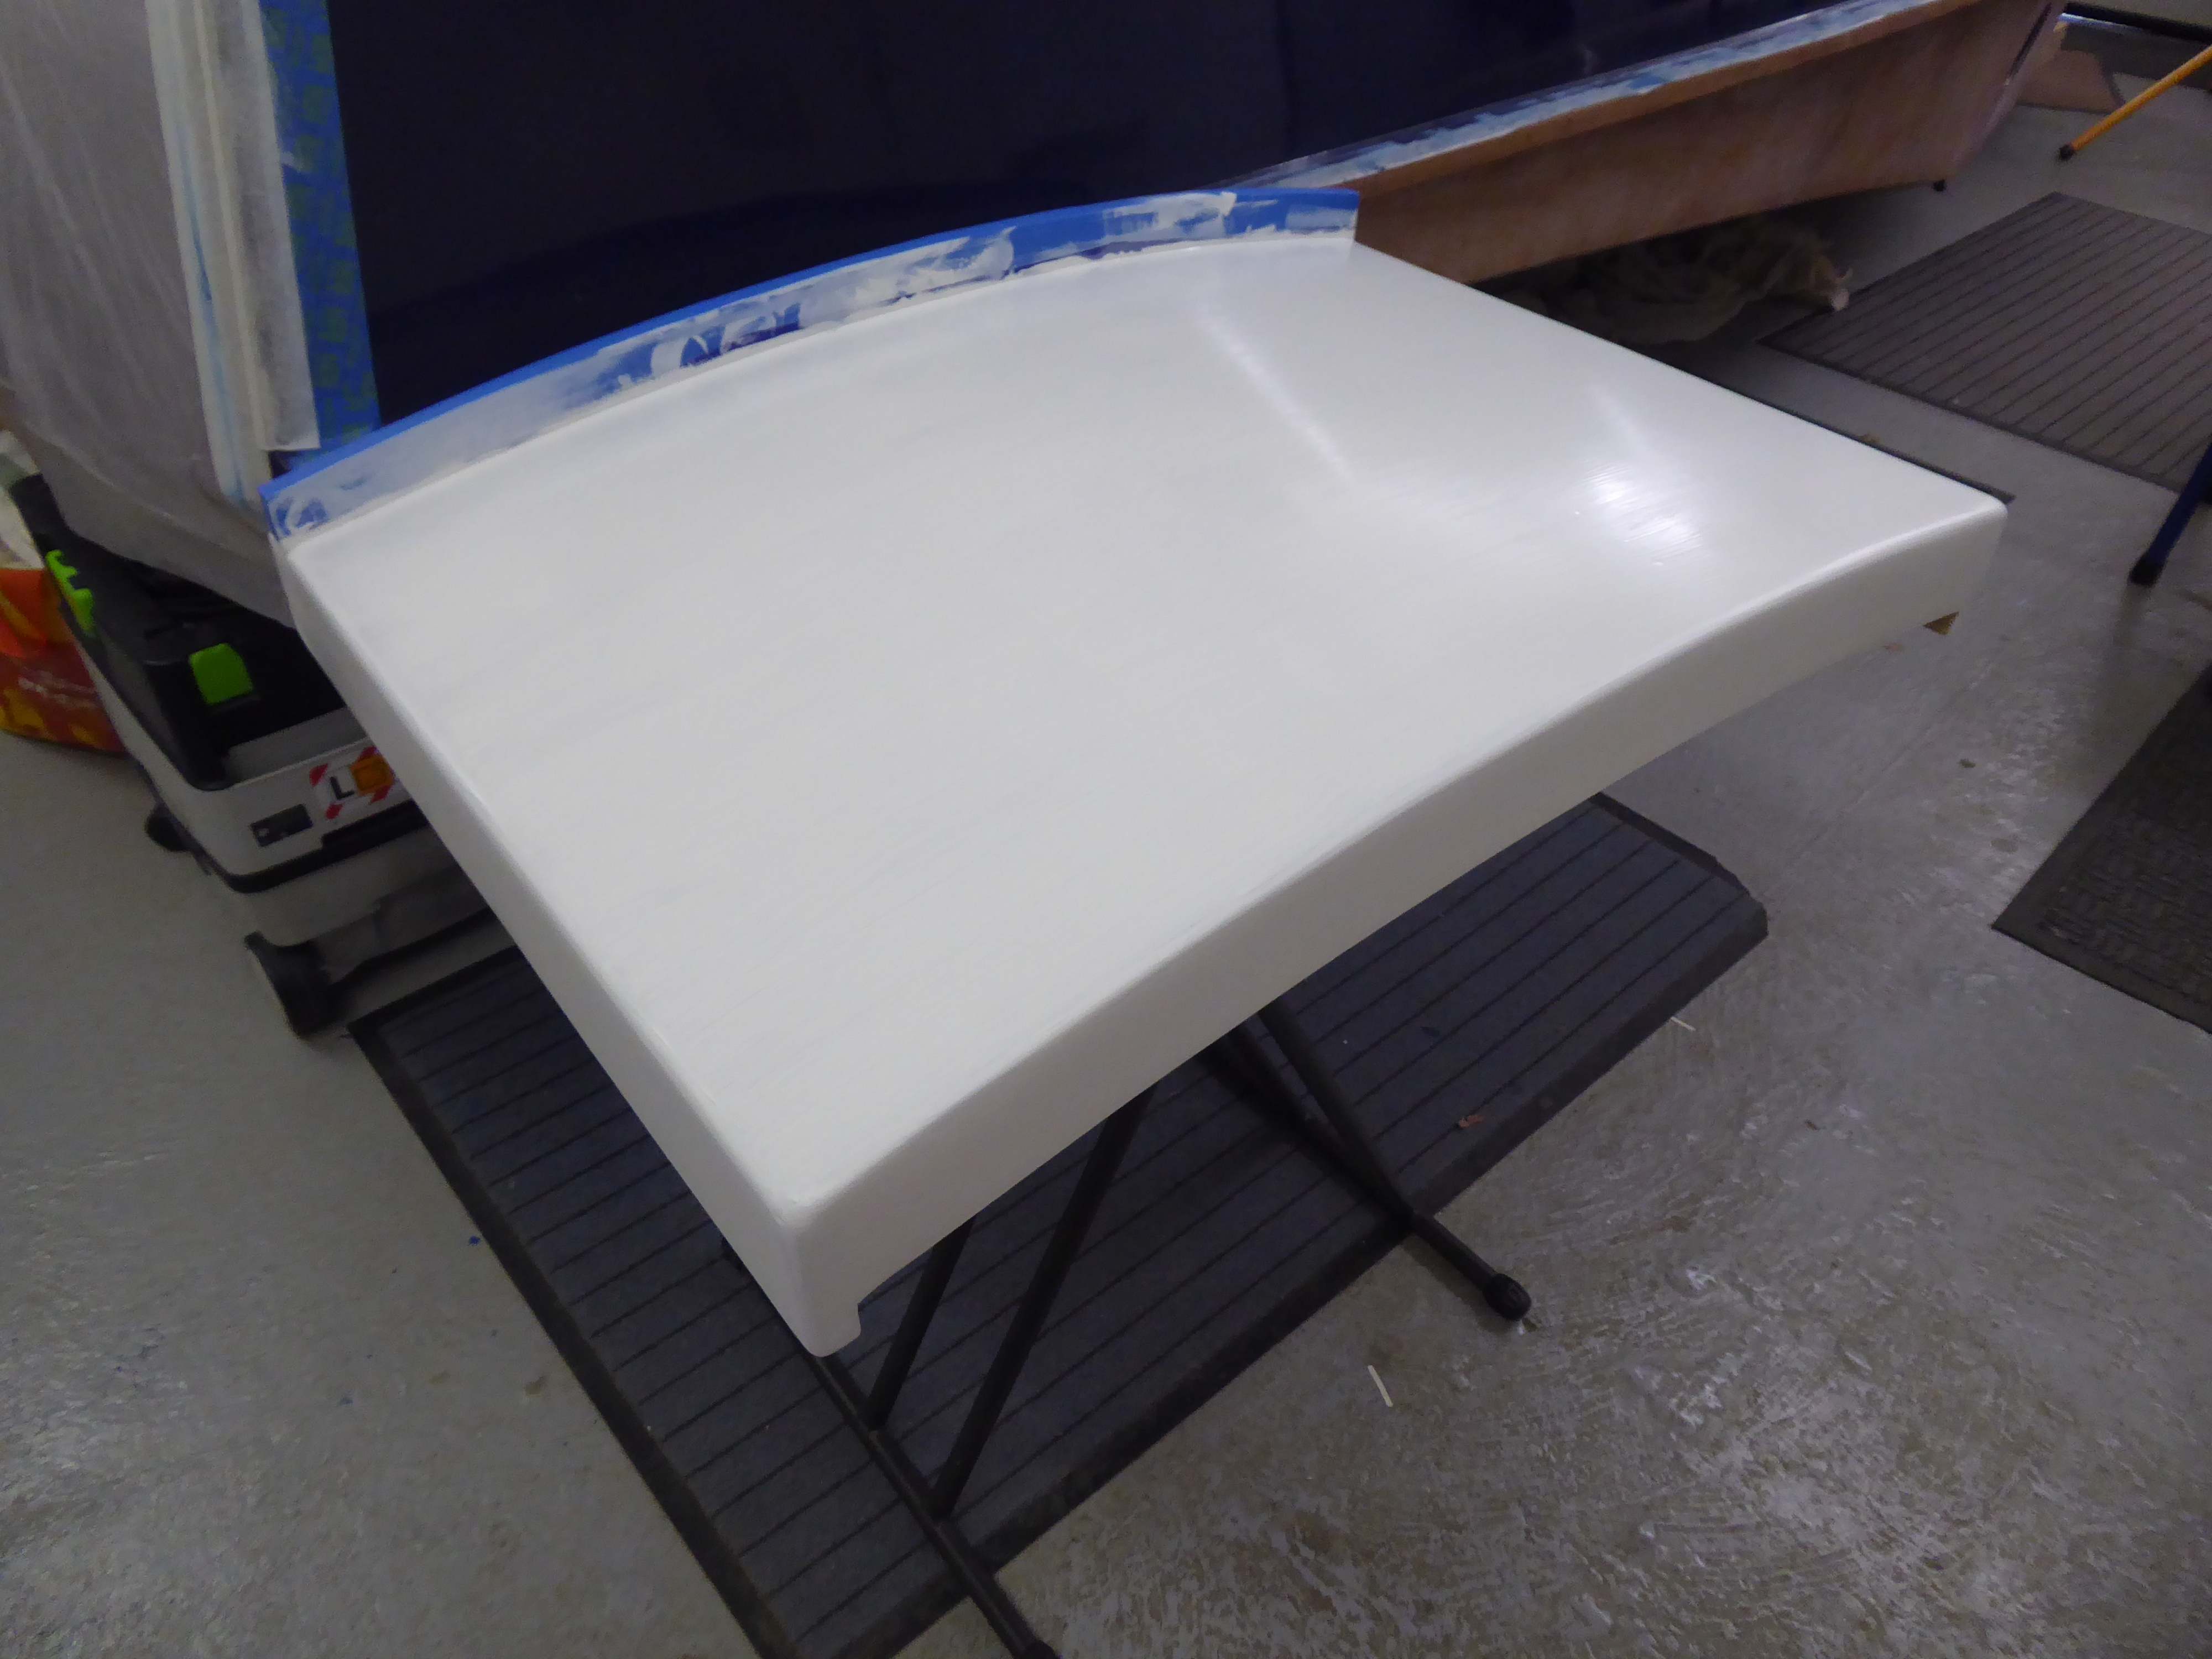
Here I have applied a third coat of primer to the outside faces of the companionway hood and the tabernacle.


And here is the companionway slide receiving the same treatment.


The primer was rolled on and tipped out with a foam brush, which is now my only method of application.


Covering Up The Hull

While varnishing the mast and spars I realised that I could easily splash varnish on the hull, so I covered it with dust sheets, like this.


Better safe than sorry! It has taken so much work to get the hull looking nice and I really don't want to spoil it …


Mast, Spars & Other Bits | Re-varnishing

Having previously discovered that applying varnish to spars with a brush was a bad idea, I wet sanded everything with a P240 grit.

That was fine with all except the tiller and the drop board retainers, which had to be taken back to the bare wood.

Here is a drop board retainer being scraped in the vice.


And here it is being sanded to P120.


Lastly here are the boom, gaff, tiller and drop board retainers being varnished or re-varnished on the bench.


I'm going to make sure everything has at least five coats of varnish, applied by roller and tipped out with a foam brush. This method gives a really nice finish.


Dings & Pivot Holes | Touching Up (2)

The first post on this topic showed how I I masked off the dings in the bottom panels which occurred when installing the centreboard, and did the same with the patches where the pivot pin had been installed in the keel.

Plenty off thin coats of gloss were then applied.

However, when I pulled the tape I found that I had created raised square patches of paint which were very obvious.

I shouldn't have masked them off. That would have allowed the patches of gloss to blend in with the hull surface more easily.

So, after much wet sanding with wet and dry paper and polishing compound I managed to flatten the patches and blend them in with the hull.

Here are the two patches on the port keel and hull.


Of course, you can't see them!

Like the blemishes I know where they are and can find them, but I think that any more work on the bottom of the hull would be a waste of time because it will be completely out of sight when the boat is upright again.

As always, we live and learn ...


Side Panels| Touching Up Blemishes

When I pulled the tape from the masked off side panels it took some tiny bits of paint with it in a few places on the port side only.

As usual I have no idea why, but it should not be difficult to tidy up the resulting blemishes.

These are are four tiny holes in the paint, filled with epoxy filler.


The same thing had happened when I pulled the masking tape on the white bottom panel, which I filled in the same way.

When cured I wet sanded the blemishes to obtain a smooth surface and touched them up with gloss.

This is a white blemish after treatment, close up.


And here are some blue blemishes at the bow, close up.


They have effectively disappeared.

I know where they are and I can find them if I look hard enough, but I think I can safely say that they're gone!

Transom | Touching Up The Frame

As expected the blue and white frame around the transom needed to be cleaned up where it overlapped onto the sides and bottom of the hull.

First I taped off the white sections of the frame and wet sanded them to get an even surface on the overlaps, and then applied more gloss to tidy things up.

Like this.


That doesn't look too bad at all.

I then did the same thing to the blue sections.

This is what the frame looked like when I pulled the masking tape. 


It's not perfect but it's good enough, and it looks great.

Thursday 19 May 2022

Transom & Side Panels | Re-Finishing The Finish!

Although I was initially happy with the way the hull had turned out I could not help but notice that the finish on the sides and the transom seemed to have a slightly dull sheen, like a bloom on the surface of the paint and varnish.

Some testing with the polishing compound revealed that the final treatment with P11000 grit was actually reducing the shine. I have no idea why.

So I gave the sides and transom a quick once over with the next grit down - the P9000.

This is what the the transom and side panels looked like after re-polishing.


And here is the view at the bow.


Very nice!


Dings & Pivot Holes | Touching Up

I managed to make a couple of dings in the bottom of the hull when fitting the centre board, and the sides of the keel where the pivot had been fitted needed to be touched up.

So I masked off the bits that needed to be painted and applied plenty of thin coats of gloss when I was painting the transom frame.

The port side looked like this.


I am hopeful that I will be able to blend the patches in when the paint has hardened off.


Transom & Rub Rails | Finishing


In all five coats of varnish were applied to the transom and rub rails.

When fully hardened I went through the (by now) usual sequence of wet sanding and finishing off with polishing compound.

This is the transom after wet sanding from P800 through to P2500.


And this is what it looked like after being treated with polishing compound from P5000 to P11000.


This is the polishing toolkit.


It consists of the Rotex 90 sander set to rotary mode and fitted with a special polishing head and a foam pad.

Polishing compound (effectively liquid sandpaper) is applied to the pad and the surface is moistened with finishing liquid.

The surface is then gently polished at slow speed, going through the three grades of grit; P5000, P9000 and P11000.

The results were excellent - smooth as glass and very shiny.

I moved on to the rub rails. This is the port rail wet sanded with P800.


And here is the finished rail.


You can see from this close up of the rail at the port quarter that it turned out very nicely.


I'm happy with that and I am now confident that the spars will all look great when treated the same way.


Spars & Other Bits | Attempting To Finish ...

I said in a previous post that I hoped that four or five coats of varnish applied by brush to the spars would provide a good enough surface for wet sanding to a good finish.

It did not turn out that way. The varnish had runs and wrinkles, and did not have an even surface.

I scraped off the excess varnish on the boom gallows and wet sanded in the by now usual fashion, from P400 through to P2500.

I followed that with polishing compound from P5000 to P11000, as in this pic. 


It was not a success. It looked horrible.

I had already started to varnish the mast with a roller, tipping out with a foam brush, and had had great success.

So I decided to do the same with the rest of the spars. They were wet sanded with a P240 grit to tidy them up and returned to the house to await re-varnishing.

We live and learn ...

Rudder | Painting The Blade

I had carefully masked off the finished blue rudder cheeks and boot top and then applied ten coats of white gloss by roller, tipping out with a foam brush.

Then I used wet and dry sandpaper to obtain a smooth surface, with no brush marks.

Like this.


I wet sanded using P800, 1500, 2000 and 2500 grits.

Lastly I used polishing compound from P5000 to P11000 to finish the surface off.

This is what the finished rudder now looks like.


Very nice. I mustn't forget to paint the bottom of the plate, though!


Transom & Rub Rails | Varnishing

The time came to varnish the transom and rub rails. I had been looking forward to this for months.

The first task was to mask off the rest of the hull to protect it from the varnish and the mess which results from wet sanding.

It looked like this.


The transom and rails were carefully sanded with a P220 grit to obtain a smooth, clean surface, and the first coat of varnish was applied. As here.


I used a roller to apply the varnish and a 4" foam brush to tip it out. It worked really well.

That's starting to look nice.

The build manual says that you know you're getting close when you're varnishing the transom.

Well, it certainly doesn't feel like it! We may be nearly finished but there is still an awful lot to do.


Mast | Varnishing

I had previously varnished the other spars with a brush, thinking that it would give a good result that would not need too much finishing.

Wrong!

One glance at the varnished spars was enough for me to realise that I should have used the by now tried and tested technique of rolling on the varnish and tipping it out with a foam brush.

So that's what I did with the mast. Here it is in the workshop after the first coat.


That was much better than a brush!


Transom | Painting The Frame (2)

I was keen to finish the blue and white frame around the transom so I masked off the the completed blue upright sections and painted the white horizontal stripe.

Like this.


And here is the finished frame, with tape and masking removed.


It will need some cleaning up and touching up to make it tidy, but I'm quite pleased with it.

If I were to do this again I would paint the frame and the boot top at the same time as the side and bottom panels, but I wasn't sure how to do so at the time.

We live and learn!


Spars & Other Bits | Varnishing (2)

There is limited space in my build area and I can rarely do two things in parallel, so I moved the companionway hood and slide back into the house and relocated some spars and other bits into workshop.

Here are the bowsprit, tiller, boom gallows, gaff, boom and drop board retainers being varnished on the bench.


I applied four coats with a good brush, thinking that would be enough and would provide a good finish.

Each coat takes two days to complete because the underside is done the following day, so this was a time consuming process.


Companionway Slide | Painting Primer

When the air bubbles in the top of the companionway slide had been ground out, filled and sanded I masked off the handrail. Like this.


The handrail will be finished bright so it needs to stay clean.

Then two coats of primer were applied, as here.


That covered nicely, although I think one more coat will be required.

The slide was then set aside so I could start varnishing the spars.