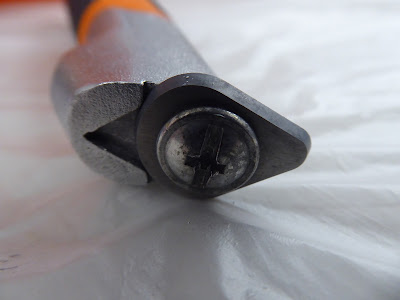
I'm using water-based, eco-friendly paint stripper and a sharp Bahco scraper. See previous posts for further information on how this works - it's very effective.
Tuesday, 18 March 2025
Upper Side Panels | Paint Stripping
I'm using water-based, eco-friendly paint stripper and a sharp Bahco scraper. See previous posts for further information on how this works - it's very effective.
Lower Hull | Touching Up & Prettying
With the lower hull now fully painted and varnished, it was time to apply the final cosmetic touches to make it really pretty.
I had experienced some minor bleeding between the white and blue areas of gloss paint, particularly at the transom but also also where the masking tape crossed over the chine.
So I masked up the errant patches. Here is a corner which needs blue paint.
And here is one which needs white paint.
This is the blue stripe after touching up and pulling tape.
That's a nice crisp line now.
I didn't mask off the bow eye and it got covered in paint, like this.
I carefully scraped off the mess, so it looked nice again. As here.
I think that's it for the lower hull. Time to schedule the flip and to do whatever else we can in the meantime.
Saturday, 8 March 2025
Transom | Varnish & More Tape Damage ...
I varnished the transom in parallel with the rub rails.
In theory this should have been straightforward and the final phase of refinishing the underside of PocketShip, but as we shall see I encountered a few problems with the paint ... again!
First I wet sanded the old varnished surface using a P400 grit. Like this.
I then masked off the painted surfaces using 3M 218 tape, as I have been doing since finding that the vinyl tape I had previously used was damaging paint when removed.
This is the transom, taped up for varnish.
I applied the first coat of varnish and pulled the tape. Unfortunately the tape tore off some of the blue and white gloss.
This is the damage to the white stripe.
And this is what happened to the blue stripe.
I left plenty of time for the paint to cure before applying the tape, so I was somewhat disappointed about this latest issue with masking tape.
I wet sanded the damaged areas to flatten the surface, ready to be touched up or repainted.
I then taped up for the second coat of varnish using 3M 244 High Precision tape, which is a lower tack than the 218. This is it.
This works well. It doesn't give quite as sharp an edge as the 218, but it doesn't damage fresh paint. It is the most precise tape in the 3M professional decorator's tape, so it will have to be used.
I wet sanded the varnish with a P400 grit and applied the second coat. This is what it looked like when I pulled the tape.
You can see the flattened out damage on the blue stripe. It was obvious that the blue and white stripes would need to be repainted, but I hadn't thought about how to do it at this stage.
Again I wet sanded the varnished transom with a P400 grit, feather edging it with the painted stripes.
Epifanes recommend doing this between coats, and it worked really well on the rub rails. This is how it looked.
The third coat of varnish was then applied. Here it is before the tape was pulled.
And here it is after.
It was starting to look really good, apart from the damaged gloss paint. I am thinning the varnish with 10% Epifanes thinners on all coats, as I did on the rub rails, and it dries with no sags or brush marks.
Ready for the seventh and final coat of varnish, I decided to wet sand the whole of the blue and white stripes at the same time as the varnish. Again a P400 grit was used. Like this.
I then touched up the damaged areas with white and blue gloss.
My plan was to completely repaint the stripes before applying the final coat of varnish. Here I have taped up for blue gloss.
I am using the 3M 218 tape here, because it doesn't damage the surface of the varnish. It dries to a harder finish than the paint.
I applied two coats of blue gloss, wet sanding between coats. I added 10% Epifanes Easy Flow to the paint, and it flowed beautifully and dried with no brush marks.
Then I did the same with the white stripe. It only needed one coat to cover well.
This is what the transom now looked like.
So we were now ready for the final coat of varnish. This is the transom taped up in readiness.
And here it is with varnish applied.
And, finally, here is the finished product. Looking very nice indeed.
It was annoying that I had experienced more tape damage, but I now know to use the low tack 244 tape on painted surfaces wherever possible.
It doesn't give as sharp an edge as the 218, but it's plenty good enough. If you didn't know which tape had been used you really couldn't tell the difference.
So that's it! The entire underside of the boat has been reworked and refinished and is now ready to be turned right way up again.
It's still pretty cold and wet here in the UK, so I will wait until the weather improves before summoning a crew to flip PocketShip ... again!
Rub Rails | Varnish
With the sides of the hull finished I was keen to varnish the rub rails and the transom.
First I machined-sanded the rails with a P120 grit and finished them by hand with P180.
This is what they looked like.
That was better! They were quite dirty and marked after months of work on the hull.
Time to break out the varnish. I had again switched brand to Epifanes, and chose their single part, traditional yacht varnish.
It has a very high reputation. This is it.
I followed the product instructions to the letter.
On bare wood they say to apply three heavily thinned coats to penetrate the grain. These coats are thinned with 50%, 25% and 15% of Epifanes thinners respectively.
So I did that. It really did sink in and seal the grain.
We are then required to apply at least four more coats. I thinned all four coats with 10% thinners, and it flowed and cured beautifully.
This is the port rub rail after it's final coat.
The rails look fabulous. The varnish has cured with no brush marks at all.
I'm so pleased I switched to Epifanes!
Epifanes Gloss Paint | Test Piece
Way back in September last year I stripped and repainted a drop board with the new Epifanes white gloss paint.
The idea was to test the paint by leaving the board outside, exposed to the elements for a few months.
Having suffered failure of the original paint when exposed to water, I was keen to be sure that it would not happen again with the new stuff.
This is what it looked like after several months of being ignored.
It was very dirty so I washed it and inspected the paint. It was slightly marked where water had lain on the surface.
Like this.
Oh dear, I thought. Not again!
I consulted the Epifanes product catalogue, and this is what it states.
"Water Stains. These may develop when rain or other moisture falls on a semi cured coat. After evaporation, chalk and salts from the water remain on the outer film and lead to discolouring."
It seems like I didn't allow the paint to fully cure, although I could not remember how long I left it before putting the board outside.
For a second test I turned the board over and left the pristine underside exposed for several more weeks to see what happened to what had to be a fully cured surface.
It was fine. After washing and cleaning the surface was perfect. Here it is.
So all was well in the end. Phew!
Tuesday, 11 February 2025
Gloss Paint | New Conditioner & 6th Coat
As expected the fifth coat was an improvement on the fourth but was still not nice enough for the 'show coat'. I was still getting brush and lap marks, and wanted to avoid this as far as possible.
I mentioned in the previous post that I found a gold mine of useful tutorial videos on the Off Center Harbour website. The third of three 'how to varnish' videos really sang the praises of Epifanes Easy Flow paint conditioner. The tutor said it was 'like magic' and she always used it when varnishing.
So I got some. It can be used with any traditional or synthetic single part paint or varnish. This is it.
I obtained a small glass measure so I could accurately administer a small dose, if needed.
The fifth coat was wet sanded with a P400 grit in readiness for the sixth and final coat, as recommended by Epifanes. This takes a long while but is worth it for the excellent surface which results.
Here we are wet sanding blue gloss on the port side.
Good lighting is essential.
And here we are wet sanding white gloss on the starboard bottom.
When feathering the joins between white and blue paint I did sand through to primer in some places, so some touching up was required. Like this.
The touched up patches were then wet sanded when cured, to blend in with the rest of the surface.
The undersides were then masked up, firstly for white gloss. The sixth coat was applied and the tape pulled.
This was allowed to fully cure for a week before the hull was masked up for blue gloss, and again the sixth coat was applied and the tape pulled.
For this coat I didn't use any thinners or hardener, but instead I added 10% Easy Flow conditioner.
It worked really well, especially on the blue paint.
This is the starboard side.
And here is the transom.
It looks really good!
The paint flowed out really well on the sides and on both blue and white stripes. The bottom panels aren't quite so nice, but they will be out of sight and will get abraded anyway, so I'm not going to worry about it. It is certainly not worth another coat.
I will be using Easy Flow from now on. The sides and the stripes have no brush or lap marks, and from a couple of yards away you would think it is a spray finish.
Repainting the undersides has been a trial but I have learned so much and I am confident the topsides will turn out well.
I will now allow the blue paint to cure before varnishing the transom and rub rails.
That feels like progress!
Gloss Paint | New Tape & 5th Coat
Well, it's been quite a while since my last post. The Christmas festivities took up a lot of time, as usual, and we have had a lot of work done in the house which has meant I have not been able to spend much time boatbuilding.
However, I have not been completely idle.
In the previous post I had finished applying the fourth coat of white and blue gloss on the undersides of the boat. This coat was thinned with 10% Epifanes thinners and had 5% AwlGrip hardener added.
I didn't really expect it to be the final coat, and of course it wasn't. Brush and lap marks took care of that!
So the whole undersides of the boat were wet sanded with a P400 grit until it was beautifully smooth all over, and then masked for white gloss.
Now, since the previous post I have done a lot of research into masking tape and paint conditioners.
I found a mother lode of great advice at the Off Center Harbour website. You will have to join to access their tutorial videos, but it's worth it.
There are three excellent videos on how to varnish a wooden boat, and the second one is all about masking tape and how to use it. As a result I invested in some 3M 218 Fine Line tape, as used and recommended by a professional boat painting shop. This is it.
It comes in various widths. I am using 1/2" for long straight or slightly curved sweeps, and 1/8" for tight curves. The 1/2" tape doesn't like tight bends - it buckles.
This is the transom masked up for white gloss.
I have to back up the 218 tape with ordinary masking tape because it is only 1/2" wide.
This is the transom masked for blue gloss.
And this is the starboard side masked off for blue gloss.
The fifth coats of both white and blue gloss were applied, thinned with 10% Epifanes thinners and with 5% AwlGrip hardener added.
I was hopeful that this might be the final coat, but not really expecting it to be so. I left it for two weeks to fully cure.
See the next post for the outcome!