Thursday, 25 November 2021

Bowsprit & Mast | Pivot Holes

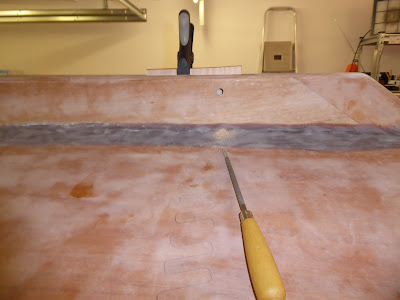
I would soon be varnishing the spars so pivot holes in the mast and bowsprit needed to be drilled.

First I set the bowsprit in place to mark up the hole, as here.


Then I set the bowsprit up on the pillar drill and clamped it in place, like this.


A spirit level ensured that the bowsprit was level and that the hole would be exactly perpendicular. Like this.


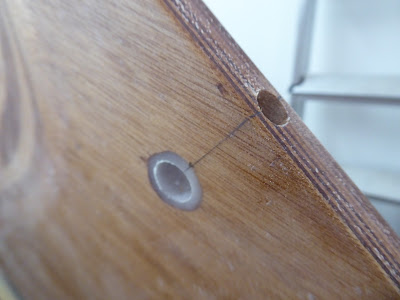
Here is the drilled hole.


I found that the drill did not have sufficient depth of travel to drill all the way through, so it had to be drilled from both sides. All went well.

The mast was next.

Here the mast is set up in the same way as the bowsprit, checked with a spirit level.


Lastly here is the drilled mast hole, again drilled accurately from both sides.


That was fun!


Keel | Pivot Hole

While drilling the centreboard I also drilled the pivot hole in the keel.

When I assembled the keel way back at the beginning of the build I thought it would be a miracle if the the pre-drilled port and starboard holes lined up exactly.

I was right. First I drilled the starboard hole, as here.


That looks OK, but when I drilled through and out the other side this is what it looked like from port.


Hmmm. That needs to be filled and re-drilled.

First I enlarged the misaligned hole with a rasp, like this.


Then I filled the hole with thickened epoxy and clamped a couple of plastic cards in place to retain the mixture. Like this.


This is what it looked like when cured.


Lastly I sanded off the excess epoxy and drilled a new hole, as here.


 All's well that ends well!

Centreboard | Pivot & Pendant Holes

It was time to get the centreboard ready for installation.

So the pivot and pendant holes had to be drilled.

I used the drill guide to make the holes through the board, to ensure that they were perpendicular. Like this.


I then carefully drilled a 9mm hole in the edge of the board, like this.


I filled this hole with thickened epoxy. A bolt wrapped in tape and passed through the board kept the epoxy in place, as here.


Lastly I drilled a 6mm hole through the epoxy plug for the pendant itself. It looked like this.


So now we have strengthened waterproof holes in the centreboard.

And it's ready for paint!

Hull Exterior | Clear Coating & Sanding

 A lot of sanding was required to get the hull to a suitable condition for paint.

The manual states that we could easily spend a day sanding the hull. I 'easily' spent several days on the requisite three clear coats of resin.

This is the part sanded hull after its second clear coat.


I am using the Rotex 90 sander with a medium-soft head in finish-sand mode. It works really well on curved surfaces.

This the hull after its third and final clear coat.


This is what it looked like after final sanding to P80 grit.


The bits of blue tape mark where a small ding needs to be patched or faired. There were very few.

And while I was at it I sanded the rub rails and rounded them over with a rasp and some sandpaper. As here.


They are looking nice!


Hull Exterior | Bubbles & Patches

When I sanded the fibre glassed hull I discovered that there were a number of tiny air bubbles on the side panels only.

They looked like this, with a rule for comparison.


I wasn't sure if this was a problem or not, so asked the vendor for advice.

They said that the bubbles were tiny and I should sand them out and coat them with epoxy.

I decided to grind them out and use fairing compound to get a flat surface before applying more epoxy. I used a small burr in the drill, like this.


This is what the ground out bubbles looked like when filled.


 Here they are after sanding and a second coat of epoxy.


I also managed to sand through the fibreglass on the hull in one or two places, so I applied patches to them, like this one on a puzzle joint.


I made the patches oversized to allow plenty of room for feathered edges and to provide strength.

We're getting there, slowly but surely!


Hull Exterior | Transom Fibreglass

I decided to make a pattern for the fibreglass panel on the transom. Here I am cutting out the panel from the pattern.


Once again the stuffed chicken doorstops had their role to play.

This is the panel on the transom, held in place with tape.


 A second clear coat was applied to the hull, as here.


And lastly the transom received its first clear coat, wetting out the fibreglass. Like this.


Looking good!


Hull Exterior | Feathered Edges & Clear Coat

When the first clear coat of resin had fully cured I feather edged the overlaps on the fibreglass panels with P80 grit. Like this.


Then I sanded the entire hull, again with P80 grit. As here.


Next step is fibreglass on the transom.