Sunday, 3 October 2021

Keel | Port Fillet Disaster!

Flush with success and confidence from making the starboard fillet I set to work on the other side the following day.

It did not go well.

On the first fillet I shaped it roughly as I went, but on this side I decided to apply the fillet mixture in one pass and shape it afterwards.

Big mistake.

Working from stern to bow, by the time I got to the nose of the keel the resin in the rear half of the fillet was already curing and was too hard to shape.

So I applied Peel Ply to the front half and shaped it with a roller before that started to go off too.

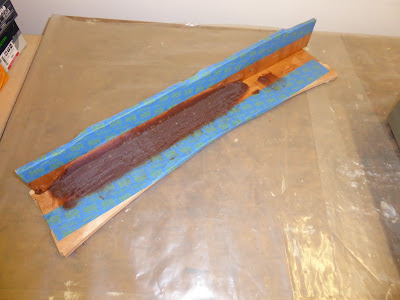
I was now confronted with a sorry sight, as here.
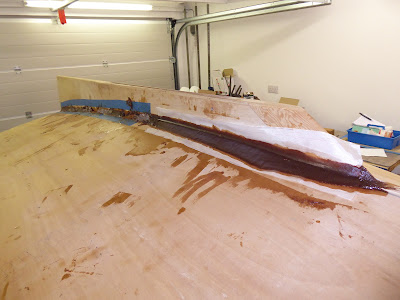

There was nothing more to be done so I removed the blue tape and hacked away as much of the hardening epoxy as I could and left the whole thing to cure.

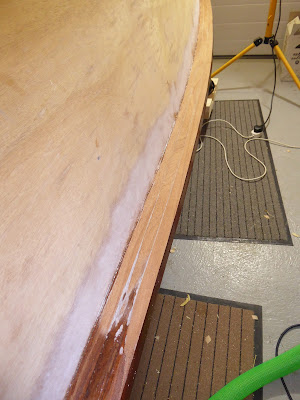
It was disappointing but entirely my mistake, and I knew I could reshape and finish the rest of the fillet just as I had done many times before.

Onwards and upwards!


Keel | Making The Starboard Fillet

Satisfied that Peel Ply was the way to go for making fillets, I taped the keel up. The tape is about 1 1/2" from the seam, to give a nice wide and fat fillet.

I applied and roughly shaped the fillet, removed the blue tape, and cleaned up any excess resin.

Next I covered the fillet with a strip of Peel Ply. 

I then wetted out the strip with clear resin and shaped it with a 3" nylon roller.

It looked like this.


Close up you can see that the fillet is holding its shape and is nicely smooth, as here.


That's a huge improvement on previous filleting activities!

This is the cured fillet, with the Peel Ply removed.


It just needs to be sanded and faired and it will be ready for fibreglass.

We're getting there!


Peel Ply | Test Fillet & Revelation!

Readers of posts early in the build will know how much I enjoy the process of making a decent fillet, which is not at all.

My usual approach is to make the fillet as best I can with a shaped filleting tool, and let it cure to an inevitably rough and spikey finish which is as hard as concrete.

I then dress this to a reasonable profile with a carbide burr before fairing it with more fillet mixture. Lastly this is sanded to a smooth finish, with a sander and by hand.

This is effective but is tedious and very time consuming, and I have always wondered if there is a quicker and better way of making nice, smooth fillets.

I recently watched some instructional videos on the internet on how to use epoxy resin and fibreglass, and discovered something called Peel Ply.

As the name suggests, this is a sheet material which is applied over epoxy resin. When cured you simply peel it off, leaving a flat textured surface ready for the next process.

I decided to try it out, so I made a big fat test fillet on some scrap ply and covered it with a strip of Peel Ply.

I then wetted out the strip with some clear resin and shaped it into a nicely contoured fillet with a hard nylon roller.

This is what it looked like.


When the fillet was fully cured I peeled the strip off the surface. Here it is partly peeled back.


You can immediately see that the fillet has held its shape and requires  minimal finishing.

Here is the final fillet.


I should of course have removed the blue tape and cleaned it up before applying the Peel Ply, but it's only a test and lesson learned.

I will use Peel Ply to make the remaining fillets on the boat. If I had discovered it earlier I could have saved very many hours shaping fillets, but hey ... as my son tells me when I become discouraged by boatbuilding setbacks: "Don't forget, dad. It's a journey!"


Hull Exterior | Filling Gaps

It was time to fill any holes or gaps on the outside of the hull, ready for fibreglass.

After sanding I thought the exterior seams looked surprisingly good.

This is the joint between the keelson and the bottom panels forward of the keel.


And this is the joint between the bottom panels, keelson and keel.


Not too bad!

This is the starboard hull with gaps filled, seen from astern.


And here it is seen from the bow.


It is turning out to be a really nice looking boat.

Rub Rails | Sanding Flat

Now the hull was upside down it was time to flatten the underside of the laminated rub rails. Not only was there a lot of squeezed out glue to clean up, but the underside is also cambered so some careful shaping is required to make sure the rails stay fair.

I used the Rotex 90 sander in geared rotary mode to rough out the shape, and then in random orbital mode to fair everything nicely.

This is one rail partly sanded.


Here both rails have been finished. The starboard rail has some fillet mixture applied to fill small gaps.


Here is one of the rub rail scarf joints after sanding. I'm pretty pleased with how they turned out.


Now for the hull itself ...


Flipping The Boat | Levelling The Hull

When constructing the dollies to support the upturned hull I made sure they were of the correct height for the hull to be level, but of course had zero expectation that it would be level at first attempt.

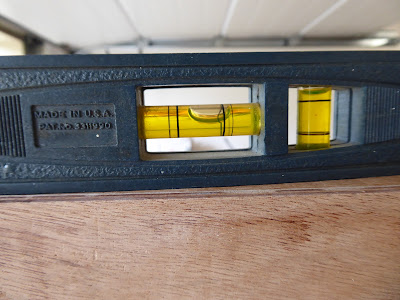
I was right. A level laid along the keel showed it sloped downwards front to back, like this.


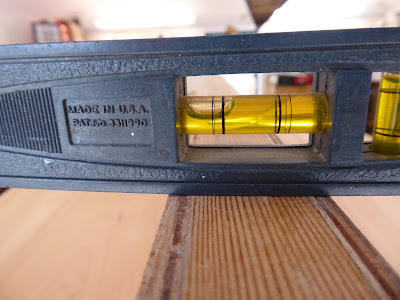
Likewise the level laid across the keel showed it also sloped from side to side. As here.


Not surprising, really.

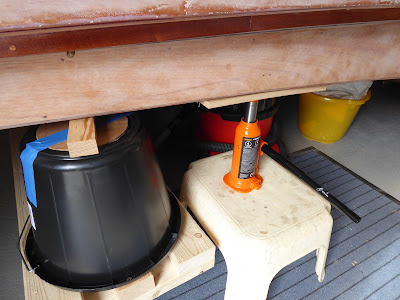
So I purchased a small bottle jack to lift the hull for levelling. It was very good value for money, which is not something which can be said about most boatbuilding materials.

Here it is in action.


 Note the wedge on top of the dolly to raise that side to make the hull level.

That didn't take long.


Sunday, 5 September 2021

Progress, or rather the lack thereof ...

It's been four weeks since we flipped the boat upside down, and I was hoping to get the bottom at least partly finished by now.

But it hasn't happened. For various reasons there have been a lot of distractions from boatbuilding and August was pretty much a write off as far as progress is concerned.

But not to worry. This isn't a race and I don't have any real deadlines other than a desire to finish PocketShip this year, which seems eminently achievable.

The boat has been built, and I have all the hardware and materials to finish it. I even have the sails ready to go.

So, watch this space.

Next step is to fillet the keel and 'glass the bottom of the hull.

I have also decided to fit the bow eye while the boat is upside down and before I paint it. I think it will be easier now rather than waiting until fitting out time.

Cue G&T.

Onwards and upwards!