Sunday, 6 March 2022

Boot Top | Marking Up

I decided at the start of the build that I wanted PocketShip to have a handsome boot top stripe, like the prototype.

It's a lot of trouble to do properly and some builders don't bother, but I thought it was worth the effort.

The first step was to determine how wide the white stripe on the blue side panels should be, and how far down the sides it should be located.

After consulting lots of of photos I concluded that the stripe should be about 38mm from the edge of the white bottom section at midships.

I used the laser level to mark up the top edge of the stripe, and then adjusted the bottom edge until it landed fairly at the stem and stern as shown in various builders' pics.

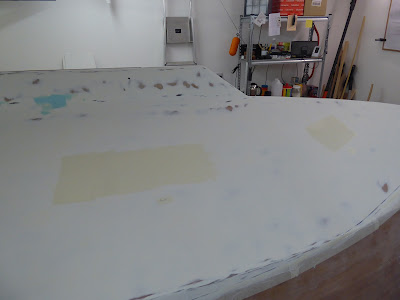
This is what the white stripe looked like when pencilled in half way along the hull. 


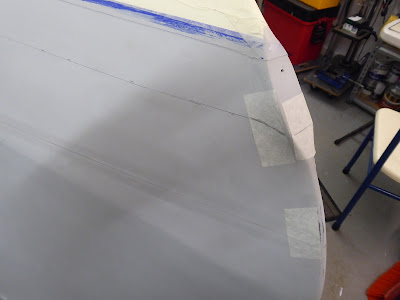
Here is what it looked like at the stem.

And this is what it looked like where it crossed the chine and ran along the bottom panels to the transom.
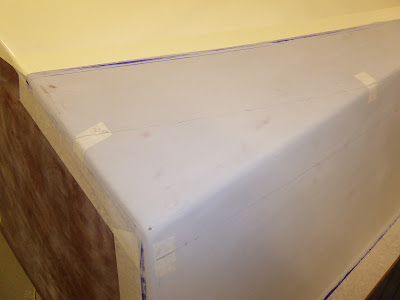

I adjusted the edges fractionally at the bow and stern to make sure they landed in exactly the same place on both sides of the hull.

Lastly I used the laser level to ensure that all was level and straight across the transom, like this.
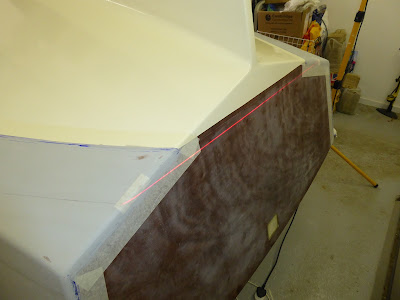

Notice how the stripe varies in width depending on the angle of the side or bottom panel, being exactly level itself from stem to stern.

I think that will look really nice. I'm happy with that!

Hull Side Panels | Sanding

When the primer had hardened I sanded both side panels to a flat, smooth finish using a P220 grit.

They looked like this.


Looking nice!


Wednesday, 12 January 2022

Hull Side Panels | Masking Off & Primer

With the painting of the bottom panels finally complete to my satisfaction it was time to tackle the sides.

I masked off the sides and the transom, like this.


I used this old wallpaper roller to burnish the blue tape, to get a really good seal against the hull.


Weapons of choice for the application of paint are a 4" nylon roller, as here.


And a 4" foam brush for tipping out, and good bristle brush for the edges. Like this.


The sides will be dark blue so require a light grey primer. I applied three coats over as many days and it turned out quite nice, as here.


I found that part of the secret to a good finish is to only roll out a small area at a time, so it can be tipped out while the paint is still fluid. It starts to dry as soon as it hits the surface, so you have to be quick.

The other trick is to only pour a small quantity of paint into the tray, for the same reason. As long as it flows freely I can keep the wet edge.

I also think that I am getting better at rolling and tipping, having now had plenty of practice ...

I am going to leave that to harden off for a couple of days before sanding it ready for paint.

Exciting times!


Hull Bottom Panels | Final Coat of Gloss?

When the test panels on the hull were dry I compared the finishes. Foam and bristle brushes both produced good results but the foam achieved a thinner coat, so that was the way ahead.

The bottom panels were then carefully sanded with P220 and then P280 grit to obtain a good, smooth surface. This is what they looked like.


I washed the panels and allowed them to dry before applying what I hoped would be the seventh and final coat of gloss.

I added 10% paint conditioner to the gloss to minimise brush marks, based on previous experiments. Here is the result.


It did not look too bad at all! There are some minute marks and dust particles which I will polish out later, but on the whole I think that it turned out OK.

So I summoned up the courage to peel off the masking tape. I was a bit worried that it would tear the paint and leave a jagged edge, but it came off beautifully.

Like this.


Leaving a perfectly clean and sharp edge. It's great stuff, this 3M tape!

This is what the bottom of the hull looks like now.


We're definitely getting there!


Festive Spirit!

Christmas and New Year came and went, and predictably boatbuilding stopped for the holiday.

Instead we ate and drank too much, as always.

Including this bottle of delicious Boatyard Gin, courtesy of my son.


A close look reveals that it is nearly empty ... cheers Nick!


Sunday, 19 December 2021

Hull Bottom Panels | It's All Coming Off!

Examination of the hull the following day revealed, as suspected, that the first coat of gloss on the bottom panels had not been a great success.

Brush marks in the primer showed clearly through the gloss, and although it wasn't really awful I knew it could be so much better.

I could also see where the wet edge was, well, no longer wet and had dried in numerous places. Not good.

The level of finish would have been OK in a house interior, with an eggshell or satin finish, but it wasn't nice enough for the high gloss surface of a boat.

So I made the decision to sand it all off and start again!

This is the port bottom panel, part sanded to P120.


And here is the bottom of the hull fully sanded port and starboard.


I expected the first round of painting the hull to be a learning experience, and it certainly was.

Key lessons learned were:

1. Primer has two distinct but equally vital roles - to provide a) a solid colour base and b) a perfectly flat surface for the gloss.

That means several coats sanded to a really fine finish, with no bare patches.

2. Despite the manufacturer's recommendations, there was no way that a really nice finish could be achieved without thinning or conditioning the gloss.

So some experimentation was required before we painted the hull. Again.

I decided to try proper paint conditioner, as shown in every 'how to paint marine gloss' video that I had seen.

The stuff that seems to be available in the UK is called Owatrol.

It's only available in trade outlets and is ferociously expensive, so a I bought a small can for the trial.

Here it is.


The instructions tell us that it should be added to paint between a 5% and 20% ratio.

So I mixed a quantity at 5% and applied it to the centreboard by way of a test. This is what it looked like.


Not too bad at all!

I also glossed the drop boards, like this.


Encouraged by the improved results I applied two test patches to the hull, as here.


I tipped out one patch with a foam brush, and the other with a bristle brush, to see which gave the best results.

So now we wait and see how it dries, and if this is the way ahead. 

Hull Bottom Panels | More Primer & First Gloss

I haven't posted for a while because there simply hasn't been anything of great visual interest to report.

I have spent the last few weeks learning how to paint a boat, or more specifically how to use marine paints. It doesn't behave anything like household paint, and advice on what to do with it varies widely.

In the previous post I had sanded the bottom panels to a really smooth P120 finish and was ready to repaint them with primer.

More primer arrived a few days later and I prepared to thin it, as recommended on the 'how to apply primer' video tutorials which I had researched.

So I read the instructions on the tin before proceeding, and was dismayed to read "Do Not Thin".

Hmmm. I called the paint manufacturer and asked them about thinning the primer. They said that would be OK for spraying, but 'not recommended' for brush and roller application. In other words, don't do it.

The new paint certainly flowed better than what I had been using, so I showed good faith and applied three coats over several days by careful rolling and tipping.

This is what it looked like.


It didn't look too bad so I went ahead with the first coat of gloss.

Again, this is what it looked like.


I wasn't convinced that it was good enough, so left it until the following day.